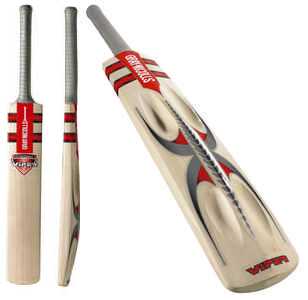
There are 3 major areas for bat care. These are 'oiling', 'knocking in' and 'protective facing'. Preparing your cricket bat takes a little bit of time so it is important not too get too anxious. You will be thankful that you spend the time preparing your bat after many years of successful innings with your new cricket bat.
Step #1 - Oiling:
Oiling the cricket bat is important so when the knocking in process occurs, the bat doesn't crack. The oil makes the bat more supple, decreasing tension so that the bat doesn't crack. Raw Linseed Oil should be used to oil your cricket bat. Using only a teaspoon of Raw Linseed Oil, rub the oil all over the cricket bat (except over the splice of the bat). When the first light coat of oil is applied, the bat should be left horizontally overnight. Another light coat of oil should be applied to the bat. Leave the bat in the same position overnight. It is important not to over oil the bat.
Step #2 - Protective Facing:
This is optional to you but it is highly recommended. A protective adhesive sheet should be applied to the bat. Most bats actually come with this sheet so at first, the whole oiling step applies once the sheet is removed. The protective sheet just protects the bat from the huge impact of the cricket ball. This protective sheet is optional but it is advised that it is used for the first year of use. Then it should be taken off and oil applied to the bat.

Step #3 - Knocking In:
This most important process in preparing your cricket bat and it is also the lengthiest process. Using a wooden mallet (available at cricket shops and most sport stores), light taps of the cricket bat should be made. Starting in the middle of the bat, lightly tap the bat and then work towards the edges. After a while, the tapping of the bat should gradually become a little bit harder. This process takes a while. 4-6 hours is generally how long it takes but it can take longer. It is important to keep checking the bat to see whether any dints are occurring. If they do, reduce the power of your knocks.
Once this is done, it's time to take the cricket bat down to the nets. It is important to start out with soft shots and then gradually getting into harder, more powerful shots after a few net sessions. Throw-downs with an old cricket ball is recommended so that no dents and seam marks occur. After a couple or few net sessions of throw-downs, you can move onto facing some bowling with an old ball. It is important to keep checking the bat to make sure it isn't being damaged. After a session or two, some harder balls can be faced so it is able to face the hard cricket ball in a game. After a few sessions, the bat is ready to be used in a game.

Step #4 - General:
If a protective adhesive facing was applied, it can be taken off after a year or so. When the protective facing is taken off, it is important to give the bat another light oil once or twice, leaving it overnight each time. Then using the mallet, give the bat another mini knock in for an hour or two. This process can be repeated each year or so onwards till you stop using it

 Posted by


1 comments:
sbbbs
Post a Comment